Wall Art Guide, Wall Art Tutoriels
Wildlife Wall Art: Animals in Nature Habitat Photography
Jul
So I’ve been totally obsessed with wildlife photography for wall art lately and honestly it started because a client wanted to redo their whole living room with this nature theme and I went down this massive rabbit hole. Like, I thought it would be simple but there’s SO much to consider when you’re picking animal prints for your space.
Size Actually Matters Way More Than You Think
Okay so first thing – and I messed this up in my own bedroom before I knew better – is that wildlife prints need to be bigger than you think. Like, a tiny 8×10 photo of a bear just looks sad on a large wall. I learned this the hard way when I bought this gorgeous wolf print and it arrived and I was like… oh no. It looked like a postage stamp above my console table.
For living rooms or bedrooms, you’re gonna want at least 24×36 inches if it’s a single statement piece. If you’re doing a gallery wall situation, you can mix smaller sizes but even then, nothing smaller than 11×14 or it just gets lost. My rule now is to measure your wall space and go with something that takes up about 60-75% of that width. Sounds like a lot but trust me it works.
The Whole Habitat Thing Changes Everything
Here’s what I didn’t get initially – there’s a huge difference between a close-up portrait of an animal and an animal IN its habitat. Both are cool but they do completely different things to a room.
Close-up shots are dramatic. Like those intense eye contact moments with a tiger or an eagle. They’re powerful and they demand attention. I use these in offices or entryways where you want impact immediately.
But habitat shots? Where you see the elephant in the savanna or the fox in the forest with morning light filtering through? Those create atmosphere. They make a room feel bigger and more connected to nature. Way better for bedrooms, living rooms, spaces where you actually relax. The depth in these photos tricks your eye into thinking there’s more space.
I had a client who was set on this close-up of a gorilla face and I loved it but her room was already kinda small and dark. We switched to a shot of mountain gorillas in misty jungle vegetation and suddenly the whole room felt like it could breathe.
Landscape vs Portrait Orientation
Most wildlife habitat shots work better in landscape orientation because that’s how we naturally see landscapes – our eyes scan horizontally. But don’t sleep on portrait orientation for certain animals. Giraffes, obviously. Bears standing up. Owls on branches. Anything with vertical movement.
I’ve got this vertical print of a red fox in snow and it’s perfect for the narrow wall next to my bookshelf where a horizontal piece would’ve looked weird.
Color Palette Is Gonna Make or Break This
Oh and another thing – you gotta think about the colors in the photo matching your existing decor. I know this sounds obvious but wildlife photography has such a range of tones.
African savanna shots tend to be warm – golds, oranges, browns. These work amazing in rooms with warm wood furniture, leather, brass accents. I’ve used elephant and lion prints in so many mid-century modern spaces.
Arctic and mountain wildlife gives you cool tones – blues, grays, whites. Perfect for minimalist spaces, Scandinavian vibes, anywhere you’ve got cool metals or blue-gray color schemes. Those polar bear and snow leopard shots are chef’s kiss for this.
Forest scenes are tricky because they can go either way depending on the light. Golden hour forest shots with deer have warmth. Overcast misty forest shots with wolves are cooler and moodier.
Wait I forgot to mention – black and white wildlife prints are actually the easiest to work with if you’re not confident about color matching. They go with literally everything and they have this timeless quality. I’ve got a black and white print of horses running and I’ve moved it between three different rooms and it works everywhere.
The Frame Situation
This is gonna sound weird but the frame matters almost as much as the photo itself with wildlife art. I’ve seen gorgeous prints completely ruined by the wrong frame.
For habitat photography specifically, you want the frame to disappear or complement, never compete. Simple wood frames in natural tones work great – walnut, oak, maple. Metal frames in black or bronze can be stunning for more modern spaces.
White or light wood frames work for beach scenes or arctic wildlife but they can wash out forest and savanna shots. I learned this when I framed a gorgeous grizzly bear photo in white and it just looked… off. Switched to a dark wood frame and suddenly the whole thing came alive.
Also matting – I usually skip the mat for large habitat prints because you WANT that immersive feeling. Mats create distance. They’re good for smaller prints in a gallery wall but for a big statement piece, go edge to edge.
Glass or No Glass
Get non-glare glass if you’re framing. Regular glass creates this annoying reflection especially if there’s a window nearby. Museum glass is expensive but worth it for really special pieces. Or go with acrylic if you’re worried about weight or if you have kids.
My cat knocked over a framed print once and I was SO glad I’d gone with acrylic. Just saying.
Where to Actually Find Good Wildlife Habitat Photography
Okay so you’re probably wondering where to buy this stuff. I’ve tried basically everything at this point.
Fine art photography sites are where you find the really stunning stuff. Sites that sell limited edition prints from actual wildlife photographers. It’s more expensive but the quality is insane. You’re getting archival paper, proper color calibration, the works. I’m talking like $200-800 for larger prints but they last forever and they look professional.
Print-on-demand sites are hit or miss. The selection is huge which is great but quality varies wildly. Read reviews carefully. Some use really good printers and paper, others… don’t. Prices are better though, usually $50-200 for decent sizes.
Etsy has become surprisingly good for this. Lots of actual photographers selling their work directly. You can often get custom sizes and you’re supporting individual artists which feels good. Just check their reviews and make sure they show actual photos of the prints not just digital mockups.
Local art fairs and galleries if you want something truly unique. I found this incredible print of bison in Yellowstone at a small gallery and I’ve never seen anything like it anywhere else. More expensive but one-of-a-kind.
Matching Animals to Room Vibes
This might sound ridiculous but certain animals just work better in certain rooms based on the energy of the space.
Bedrooms – I love calm, peaceful animals. Deer in meadows, sleeping lions, birds in gentle poses. Nothing too intense or predatory. You want restful energy. One client wanted a shark print in her bedroom and I was like… are you sure? We compromised with sea turtles and she sleeps way better now she says.
Living rooms – This is where you can go bigger and bolder. Elephants, bears, wolves, big cats. These rooms are for gathering and conversation so dynamic images work. I’ve got a print of wild horses running in my living room and people always comment on it.
Home offices – Birds of prey are perfect. Eagles, hawks, owls. There’s something about that focused, powerful energy that works for a workspace. Also intelligent animals like elephants or great apes.
Bathrooms – Okay this is random but ocean wildlife is perfect for bathrooms. Whales, dolphins, sea lions. The water connection just makes sense. I did a powder room with a humpback whale print and it’s so unexpectedly cool.
Kid’s Rooms
For kids you want something educational but still beautiful. I steer away from super cute cartoon-y stuff and go for real photography but of animals kids love. Pandas, penguins, baby elephants, monkeys. Habitat shots teach them about ecosystems too which is kinda cool.
Just avoid anything too scary or predatory. A lion hunting is probably not the vibe for a 6-year-old’s bedroom.
The Technical Stuff You Should Know
Print quality matters so much and most people don’t realize what to look for.
DPI/Resolution: You want at least 300 DPI for crisp prints. If you’re buying digital files to print yourself, check the resolution. A low-res image blown up to poster size looks pixelated and terrible.
Paper type: Matte paper is classic and reduces glare. Glossy can make colors pop but shows fingerprints and glare. I usually go matte for nature photography – it feels more natural. Metallic paper is trendy right now and can look amazing for water scenes or anything with dramatic light.
Canvas vs paper: Canvas prints don’t need glass and have this gallery wrap look that’s very modern. But paper prints have better detail and color accuracy in my opinion. Canvas can look slightly blurry up close. It’s a trade-off.
Lighting Your Wildlife Art
Oh man I almost forgot about lighting which is actually super important. Wildlife photography has all these subtle details and textures that get lost in bad lighting.
Picture lights are expensive but they make such a difference for statement pieces. Those little lights that mount above the frame? Game changer.
If that’s not in the budget, just make sure the print isn’t in direct sunlight (it’ll fade) and that it has decent ambient light. I’ve used track lighting aimed at prints and that works great too.
For really dark moody prints like wolves at dusk or black panthers, you need good lighting or they just look like dark blobs on the wall.
Mixing Multiple Wildlife Prints
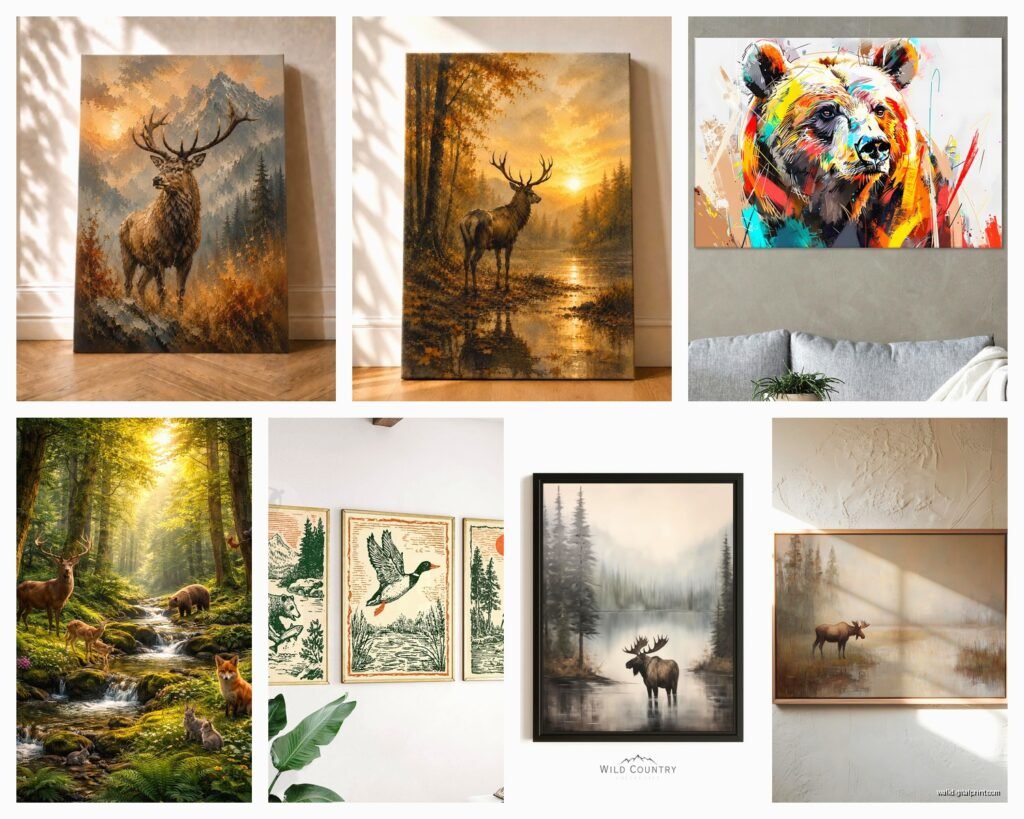
If you’re doing a gallery wall or multiple prints in one space, keep the habitats similar or the style consistent. Don’t mix arctic foxes with tropical birds unless you’re going for an eclectic maximalist thing which can work but it’s harder to pull off.
I usually stick to one ecosystem – all forest animals, all savanna, all ocean. Or I mix ecosystems but keep the photography style consistent, like all black and white or all golden hour lighting.
Also vary the sizes but keep the frames similar. Same color frame, different sizes creates cohesion without being boring.
Seasonal Considerations
This is gonna sound extra but I actually switch out some prints seasonally. My winter wildlife prints come out in November – snowy owls, arctic foxes, caribou in snow. Spring brings out the baby animals and birds. Fall is bear and moose season.
You don’t have to do this obviously but if you love changing up your decor it’s a fun way to keep things fresh without buying all new furniture. I store the off-season prints in a closet and honestly my client thought this was genius when I suggested it for her space.
Anyway that’s basically everything I’ve learned from making way too many wildlife print purchases and fixing my mistakes. The main thing is just to think about the whole vibe – the size, the colors, the animal’s energy, how it fits your actual space. And don’t be afraid to return stuff if it doesn’t work, most places have decent return policies.