Wall Art Guide, Wall Art Tutoriels
3D Printed Wall Art: Futuristic Custom Designs
Jun
So I’ve been totally obsessed with 3D printed wall art lately and honestly it’s kinda transformed how I think about custom wall decor. Like, I was watching The Bear the other night (so good btw) and kept pausing to look at the restaurant walls thinking about how much cooler they’d be with some geometric 3D pieces.
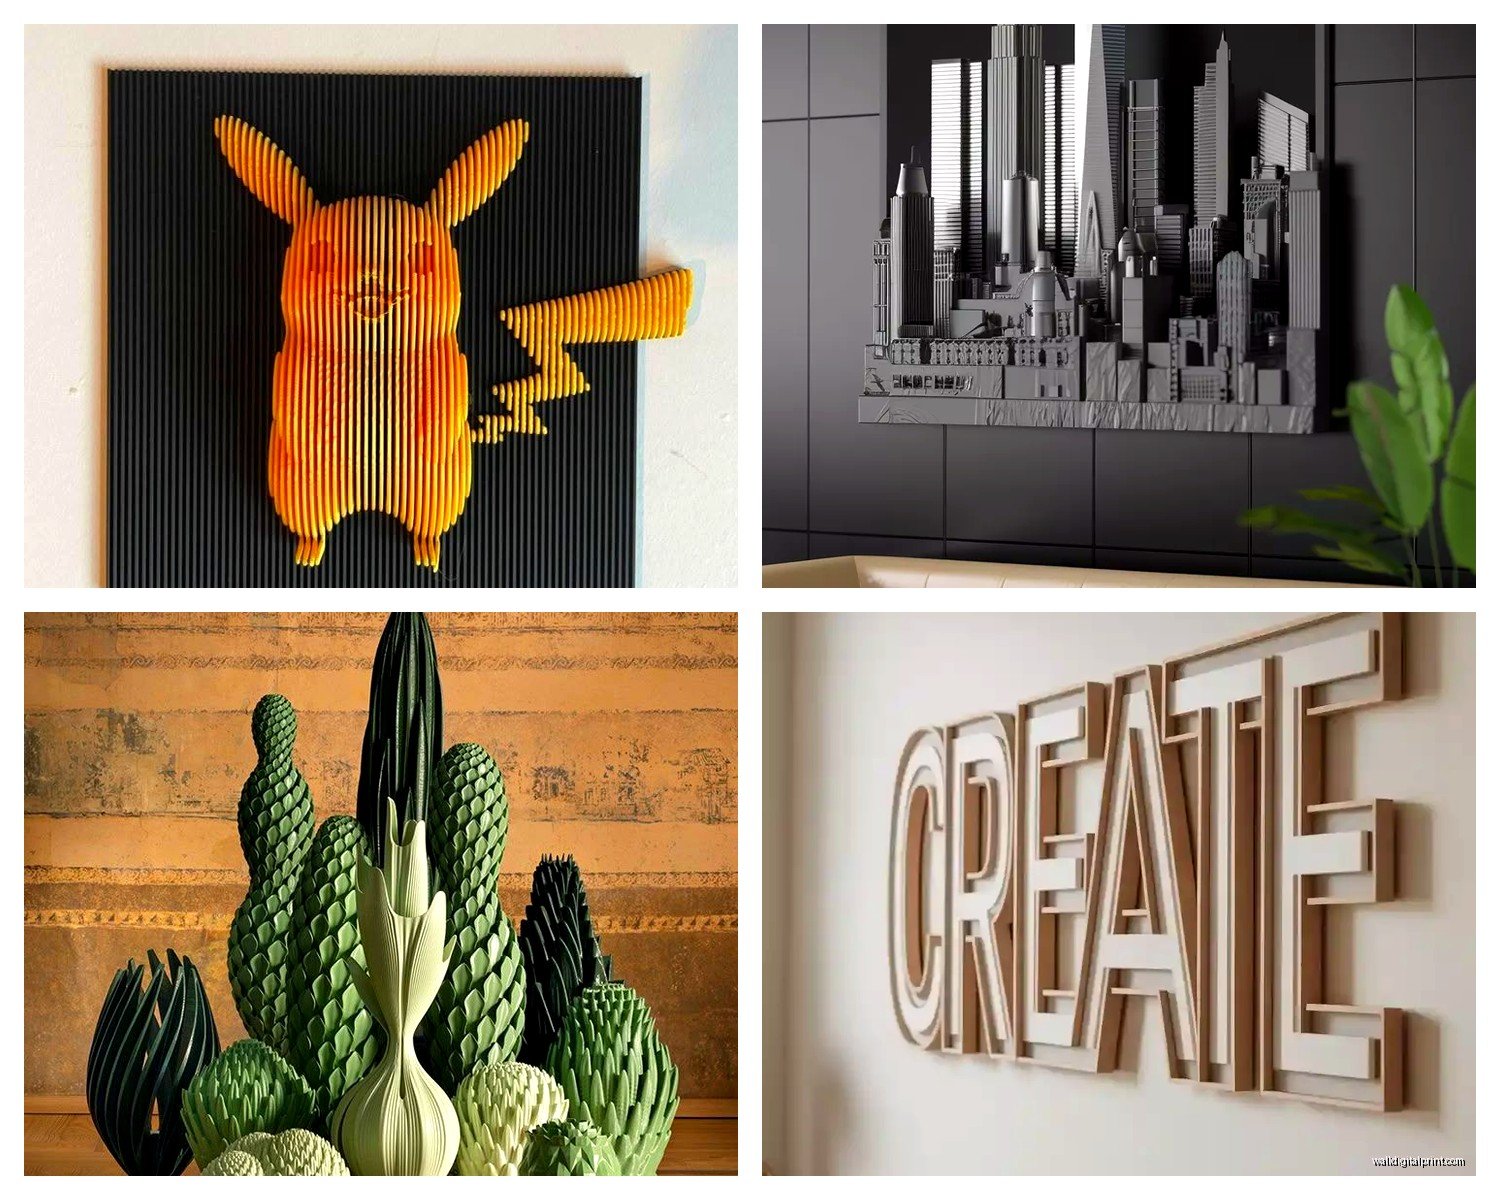
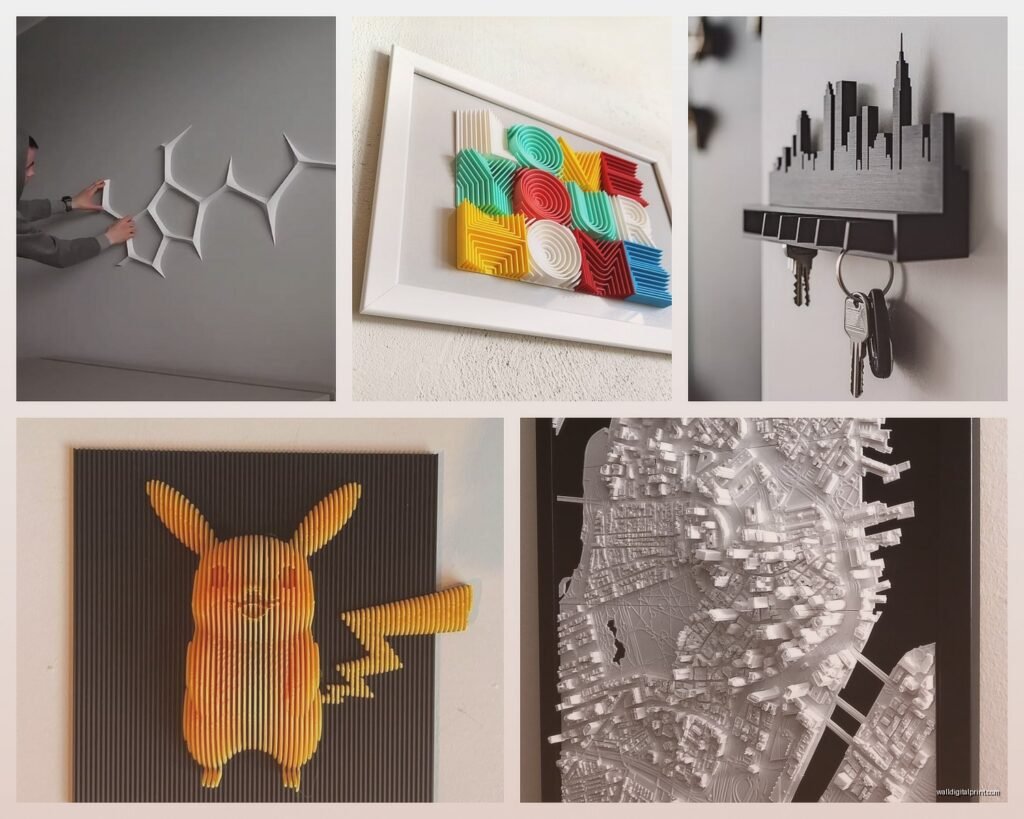
Okay so first thing you gotta know is that 3D printed wall art isn’t what you’re probably picturing. It’s not like… cheap plastic looking stuff anymore. The technology has gotten SO much better in the past couple years. I’m talking intricate designs, different finishes, and you can literally customize anything. Had a client last month who wanted her dog’s silhouette turned into this massive layered wall piece and it looked incredible.
Where to Actually Get This Stuff
You’ve got basically three routes here. You can buy pre-designed pieces from places like Etsy or specialized 3D printing shops, commission custom work, or if you’re feeling ambitious, design and print your own. I’ve tried all three and here’s the real talk on each.
Etsy is honestly your best starting point. Search for “3D printed wall art” and you’ll find thousands of options. The quality varies wildly though so you gotta read reviews carefully. I’ve ordered from maybe eight different shops now and my favorites are the ones that show actual installation photos from customers, not just the product on a white background. Look for sellers who offer different filament colors and finishes because that makes a huge difference in how it looks in your actual space.
Custom commission work is where things get really interesting but also more expensive. I worked with this designer in Brooklyn who charges around $200-600 depending on complexity. She took measurements of my office wall, we talked about the vibe I wanted (minimalist but with movement), and she created this flowing wave pattern that looks different depending on the light. Worth every penny but you gotta budget for it.
The DIY Route
If you want to design your own, you’ll need access to a 3D printer obviously. Libraries sometimes have them now which is wild. And community makerspaces. The learning curve for design software is… okay it’s steep, not gonna lie. I tried Tinkercad first because everyone says it’s beginner friendly and yeah, for basic geometric shapes it’s fine. But if you want anything organic or complex you’re gonna need to learn Blender or Fusion 360.
My neighbor actually got really into this during the pandemic and now he prints stuff for me sometimes in exchange for decorating advice. It’s a good trade honestly because the printers themselves are like $200-800 for decent home models, plus the filament, plus your time learning everything.
Material Choices That Actually Matter
This is where I made mistakes early on so learn from me. PLA is the most common filament and it’s fine for most wall art. It comes in every color you can imagine, prints easily, doesn’t smell terrible. But it’s not super durable if you’re in a humid environment or anywhere that gets hot. I had a piece warp in my bathroom after a few months of steamy showers.
PETG is stronger and more moisture resistant. Slightly more expensive but worth it for bathrooms or kitchens. The finish is a bit glossier than PLA which can look really modern and sleek or kinda cheap depending on your design and how you style the rest of the room.
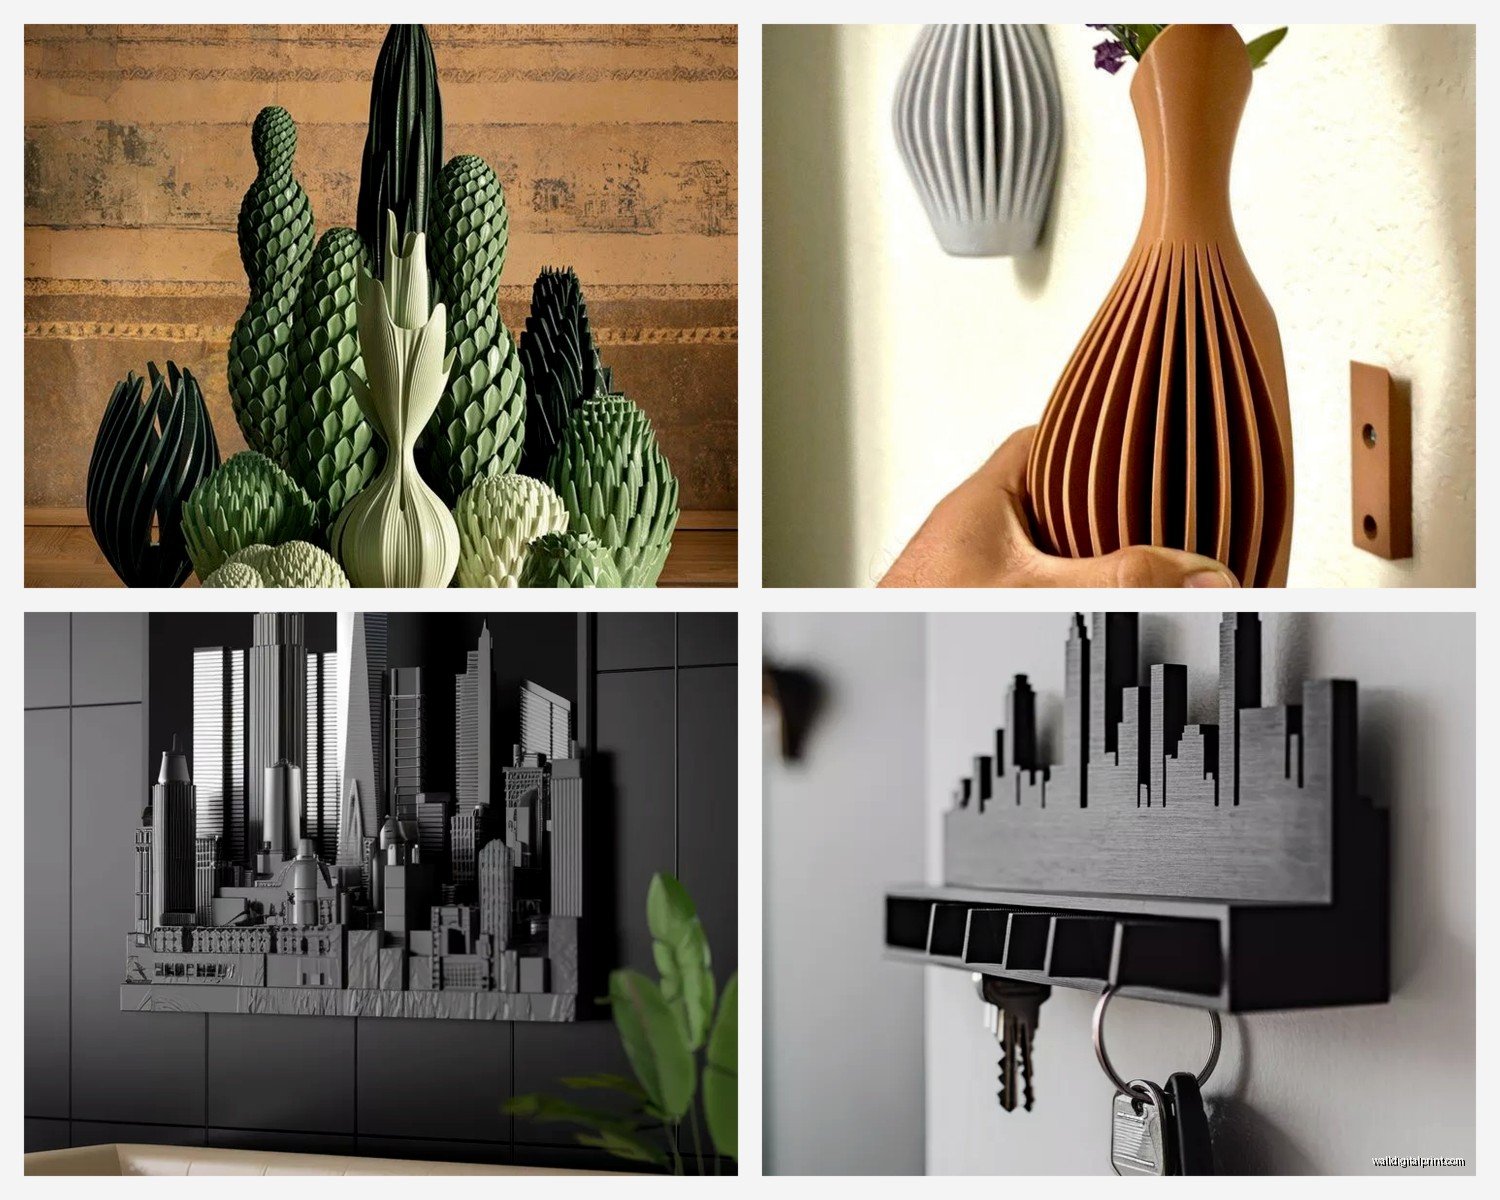
Wood filament is SO cool and nobody talks about it enough. It’s PLA mixed with actual wood fibers and the texture is incredible. Smells like wood when it’s printing too which is oddly satisfying. I did a series of hexagons in wood filament for a client’s home office and they looked like expensive carved wood panels. You can even sand them and stain them.
Metallic filaments give you that bronze or copper or silver look without the weight of actual metal. They’re trickier to print apparently (according to my neighbor who complains about them) but the results are stunning for the right design.
Design Styles That Work Best
Geometric patterns are like the bread and butter of 3D printed wall art. Hexagons, triangles, parametric designs that have this mathematical flow to them. These work really well because the 3D printing process can create precision that would be nearly impossible to achieve by hand. I did a whole accent wall in my studio with modular hexagon pieces in varying depths and it creates this incredible shadow play throughout the day.
Topographic maps are having a moment right now. You can get your favorite mountain range or even just random topography turned into layered wall art. There’s something about the horizontal layers that really shows off what 3D printing can do. Had a client who got Mount Rainier done for her Seattle apartment and visitors always comment on it.
Organic flowing designs are harder to pull off but when they work they WORK. Think waves, wind patterns, abstract natural forms. The key is making sure they have enough depth variation to cast interesting shadows because that’s really what makes 3D wall art pop.
Typography and quotes can be really cool if you don’t go too cheesy with the message. The dimensional letters add so much more interest than vinyl decals. Just keep the font clean and modern, script fonts rarely translate well to 3D printing.
Size and Scale Considerations
This is gonna sound obvious but a lot of people (including me initially) underestimate how much visual weight 3D pieces have. Because they cast shadows and have actual depth, they command more attention than flat art. A 12×12 inch 3D piece can have the same impact as an 18×18 flat piece.
I usually tell people to start smaller than they think they need. You can always add more pieces or create a gallery wall situation, but one massive 3D printed piece can overwhelm a space quickly. Unless that’s your vibe, which fair enough.
Modular pieces are your friend here. Instead of one big design, get multiples of smaller pieces that form a larger pattern. This gives you flexibility to reconfigure them, it’s easier to transport and install, and honestly if one piece gets damaged you’re not losing the whole thing.
Installation Tips Nobody Tells You
Most 3D printed wall art is surprisingly light because it’s hollow or has minimal infill. But the mounting method matters a lot. Command strips work for smaller lightweight pieces under like 8 inches. Anything bigger and you’re gonna want actual wall anchors or mounting tape.
The back of the piece needs to be flat or have a mounting system designed in. Some Etsy sellers include keyhole hangers printed right into the design which is smart. Others you’ll need to add your own. I use heavy duty double sided mounting tape for medium sized pieces and it’s held up great for over a year now.
Think about the lighting situation seriously. 3D wall art looks completely different depending on light direction. Side lighting creates the most dramatic shadows and really emphasizes the dimensional quality. Overhead lighting can flatten it out. I learned this the hard way when a piece I loved in my studio looked totally flat and boring when my client installed it under recessed ceiling lights.
If you can, install adjustable picture lights or wall sconces that highlight the piece from an angle. Game changer. That same client added a simple LED strip light along the top edge of her 3D piece and suddenly it looked like a $2000 art installation instead of a $200 Etsy purchase.
Color and Finish Options
White is classic and shows shadows beautifully but it can look sterile. I usually go with off white or light gray for a softer look. Black is dramatic and modern but you lose some of the shadow detail that makes 3D printing special.
Metallic finishes are having their moment. That brushed metal look works really well in modern or industrial spaces. Just make sure the rest of your room can handle it because metallic wall art becomes a focal point whether you want it to or not.
Color blocking with multiple filament colors in one piece is really cool for the right space. Like maybe a geometric design where some hexagons are navy and others are copper colored. Adds visual interest without being too busy if you keep it to 2-3 colors max.
You can also paint 3D printed pieces after the fact. The layer lines actually create interesting texture under paint. I’ve done this with white primer then acrylic paint and it works great. Spray paint is faster but you gotta do multiple thin coats because the plastic can get weird with certain spray paint formulas.
Maintenance and Durability
Dust is your main enemy. The textured surface catches dust more than flat art. I just use a soft brush or compressed air every few weeks. Don’t use water on PLA because it can mess with the surface over time.
Direct sunlight will fade colored filaments eventually, just like any art. UV resistant coatings exist but honestly just don’t put your 3D printed art in direct sun if you can avoid it.
The pieces are more durable than you’d think though. I’ve moved mine multiple times and they’ve held up fine. The biggest risk is dropping them because PLA can crack on impact. But mounted on the wall they’re perfectly sturdy.
Cost Breakdown Reality Check
Pre-made pieces on Etsy range from like $30 for small simple designs to $300+ for large complex installations. Mid-range seems to be around $80-150 for something that makes a real statement.
Custom commissioned work starts around $200 and goes up from there. I’ve seen custom pieces quoted at over $1000 for really large or complex designs but those are basically art installations at that point.
DIY if you have printer access is just the filament cost which is maybe $20-30 per kg and a small wall piece might use $5-10 worth of filament. But again, you’re investing time in learning and designing.
My cat just knocked over my coffee which is perfect timing because I’m basically done here anyway. The main thing with 3D printed wall art is that it’s still kinda new in the mainstream design world so you can get ahead of trends here. It adds dimension and interest that photos and paintings can’t match, and the customization options are basically unlimited. Start with one piece, see how you like living with it, then expand from there. Don’t overthink it too much, just pick something that speaks to your aesthetic and try it out.