Wall Art Guide, Wall Art Tutoriels
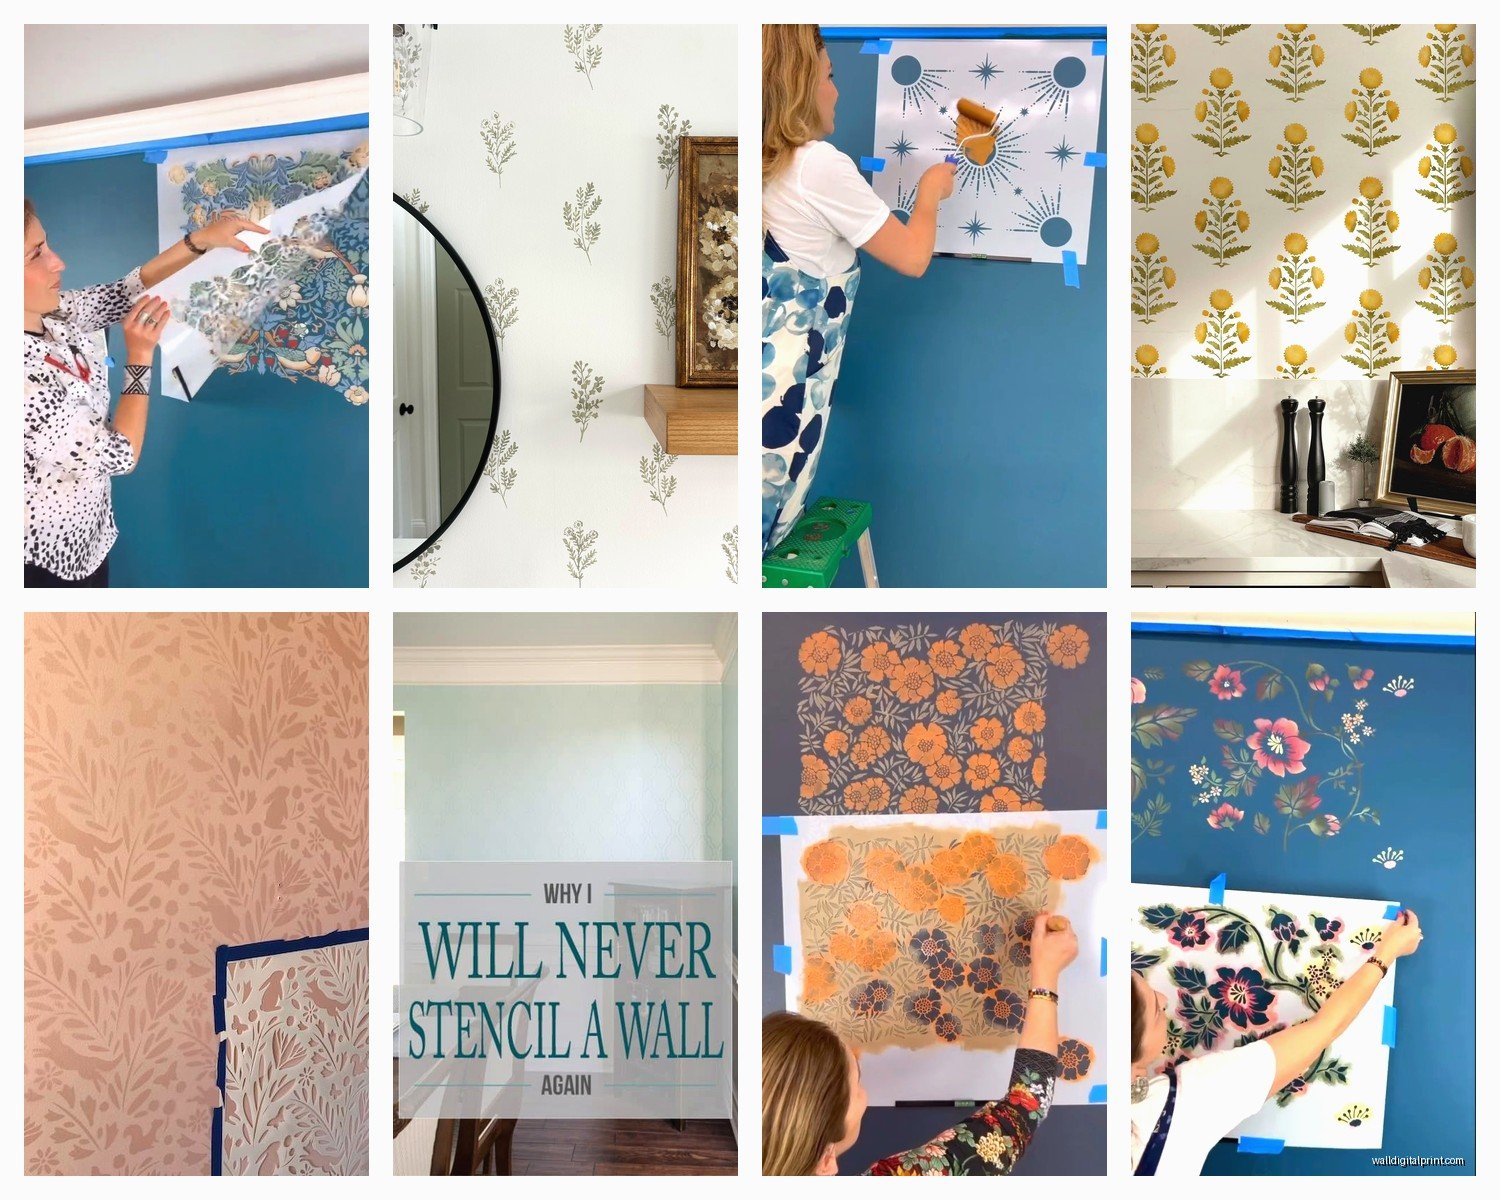
Stencil Wall Art: DIY Templates & Painting Techniques

Jun
So I’ve been stenciling walls for like three years now and honestly it’s one of those things that looks way harder than it actually is. Started because a client wanted an accent wall but didn’t want to spend $800 on wallpaper and I was like okay let me figure this out.
Getting Your Templates Sorted
First thing, you need actual stencils. I know everyone says make your own but honestly unless you’re doing something super specific, just buy them. I’ve tried cutting my own from acetate sheets and it’s… it’s fine for small projects but for a whole wall you’re gonna want something that won’t fall apart after the fifteenth time you wash paint off it.
Mylar stencils are where it’s at. They’re plastic-y, they bend without creasing, and you can literally scrub them clean. I get most of mine from Royal Design Studio or just Amazon if I’m being real. The craft store ones work too but check the thickness because some of those thin ones start curling up mid-project which is annoying.
Size Actually Matters Here
Okay so this is where I messed up initially. I bought these gorgeous moroccan tile stencils that were like 6×6 inches thinking oh cute small pattern. Took me FOUR DAYS to do one wall in my guest room. Four days. My cat knocked over my paint tray twice because I was moving so slowly she got bored watching me.
Get the biggest stencil you can handle. Like 18×18 inches minimum for walls. The larger the repeat pattern, the faster you move. Yeah it costs more upfront but your sanity is worth it. Plus bigger stencils are actually easier to keep stable against the wall.
Paint Selection Is Where People Mess Up
Do not use regular wall paint straight from the can. I mean you CAN but it’s too thin and bleeds under the stencil edges and you’ll want to cry. Been there.
Craft acrylic paint works great for small areas. For whole walls I use regular latex wall paint but here’s the trick… you gotta let it thicken up a bit. Either leave the lid off for like 30 minutes or buy those paint additives that thicken it. Folk Art has one, I think it’s called Textile Medium but it works for wall paint too? Wait no that’s for fabric. Anyway there’s something similar for walls.
The Foam Roller Method
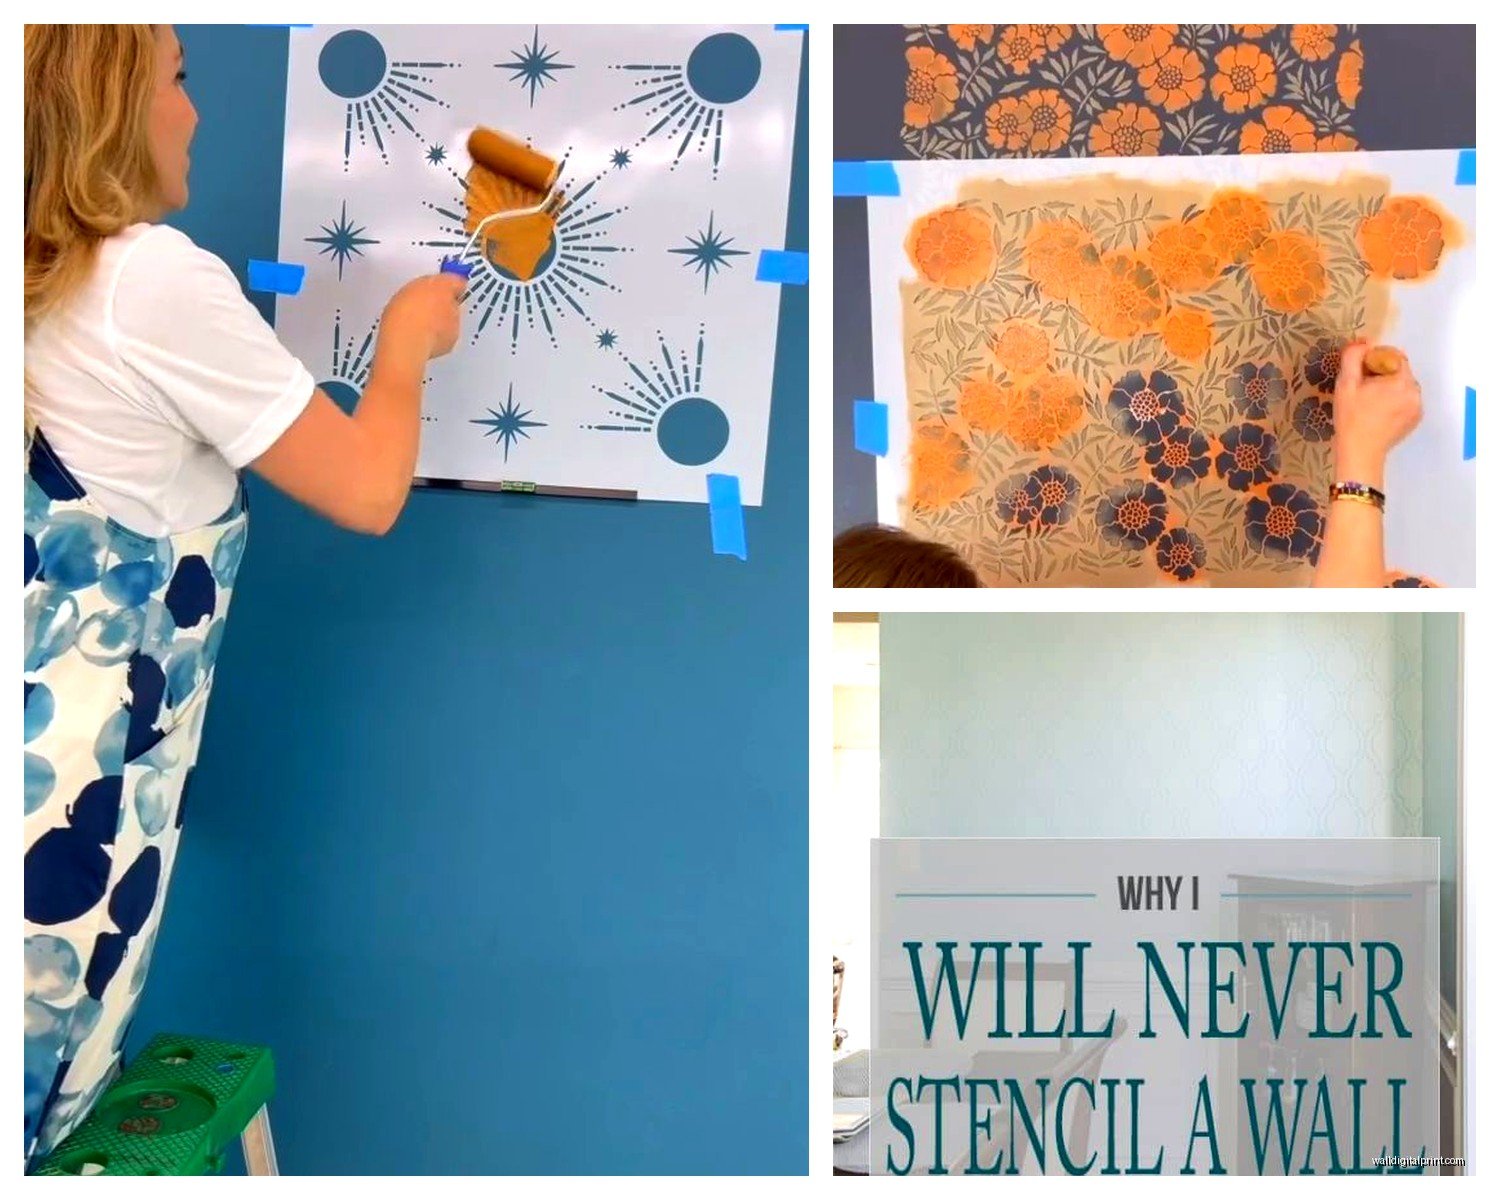
Forget brushes unless you’re doing tiny detail work. High density foam rollers are the move. The little 4-inch ones they sell specifically for stenciling. You want that super dense foam, not the regular painting roller texture.
Pour a tiny amount of paint on a paper plate. And I mean tiny, like tablespoon size. Roll your roller through it then roll off the excess onto paper towels or newspaper until the roller is almost dry. This is called “offloading” and it’s literally the most important part. If your roller is too wet, paint seeps under the stencil. If it’s almost dry, you get crisp edges.
I usually roll off onto paper towels until I think I’ve done too much, then do two more rolls. That’s the right amount.
Actually Putting Stencil on Wall
Repositionable spray adhesive changed my life. Krylon makes one, Elmer’s makes one. Spray a light coat on the BACK of your stencil, wait like 30 seconds, then stick it to the wall. It holds it flat so you’re not taping every single edge, but it’s not so sticky that it pulls paint off when you move it.
Some people use painter’s tape and that’s fine but honestly you’ll spend so much time taping. The spray adhesive bottle lasts forever too because you barely use any each time.
The Actual Painting Part
Press your stencil flat against the wall. Use a level for the first one because if you start crooked the whole wall will look drunk. Start in the least visible corner of the room because your first few are gonna be your learning curve.
Hold the roller perpendicular to the wall and use a light pouncing motion. Not rolling side to side, that pushes paint under the edges. Straight up and down pouncing. Start at the edges of the design and work inward. The edges are where bleeding happens so you want those done with your driest paint.
Do thin coats. Two thin coats look way better than one thick coat. With thin coats you can peel the stencil off immediately and move to the next spot. Thick coats stay wet and smudge.
Registration Marks Are Your Friend
Okay so funny story, I did an entire hallway with a damask pattern before I understood registration marks. The pattern was supposed to line up continuously but every row was slightly off and by the end it looked like the wall was melting. Don’t be me.
Most good stencils have little notches or marks at the edges that show you exactly where to line up the next repeat. Some have corner registration marks, some have edge marks. Whatever yours has, actually use them. I mark mine with a tiny pencil dot on the wall through the registration hole, then line up the next placement using that dot.
Working in Sections
I usually do three or four stencil placements before going back to do the next row. This gives the first ones time to dry so I’m not accidentally brushing against wet paint. Also my arm needs a break because holding that roller at the right angle for extended periods is weirdly tiring.
For whole walls I work in roughly 3-foot square sections. Do a section, take a break, admire my work, let the dog out, do another section. Trying to power through just leads to mistakes when you’re tired.
Problem Solving The Common Issues
Paint bleeding under the stencil edges means your paint is too thin or your roller is too wet. Fix: thicker paint, drier roller. Also make sure you’re actually pressing the stencil flat. Sometimes walls have texture and you gotta really press those edges down.
Fuzzy edges instead of crisp lines usually means you’re rolling side to side instead of pouncing, or you pulled the stencil off before the paint was dry enough. With thin coats you can usually remove immediately but if you went thicker, wait two minutes.
The Edges and Corners Situation
Corners are annoying because your stencil won’t lay flat. I either bend the stencil if it’s flexible enough, or I use a small detail brush to carefully paint the part that goes into the corner. It won’t be perfect but corners are hard to see anyway so nobody notices.
For ceiling edges and baseboards, I just stop the pattern about two inches from the edge. You could try to squeeze partial patterns in there but honestly it looks cleaner to just have a clean margin. Makes it look intentional instead of like you ran out of room.
Multi-Color Stencils
If you’re doing a design with multiple colors, you need a separate stencil layer for each color. Or you need to use painters tape to block off sections. I did a bedroom with a two-color geometric pattern last year and it required patience I didn’t know I had.
Do the background color first over the whole wall. Let it dry completely, like overnight. Then come back and do the accent color. The drying time is crucial because if the first color isn’t fully dry you’ll pull it up with the stencil.
wait I forgot to mention you should practice first. Get a piece of poster board or use a closet wall or something and do like ten practice repeats. You’ll figure out your paint consistency and your technique without committing to your main wall.
Cleanup Between Sessions
If you’re stopping for the day but not done with the whole wall, clean your stencil immediately. Dried paint on a stencil is the worst. I just take mine to the bathtub and rinse it under warm water, using an old toothbrush to get paint out of the detailed areas.
Lay it flat to dry on towels. Don’t hang it to dry because it can warp. I learned this when my favorite mandala stencil dried with a curve and wouldn’t lay flat anymore. Had to heat it with a hair dryer and press it under books to flatten it again.
Metallic and Special Effect Paints
Okay metallic stencils look AMAZING but they’re trickier. Metallic paint is usually thicker which is good, but it shows roller texture more. For metallics I actually use a foam pouncer brush instead of a roller. Gives a smoother finish.
Gold over navy blue walls is chef’s kiss. Silver over charcoal gray. Bronze over cream. The contrast is what makes it pop.
Chalk paint also works really well for stenciling because it’s already thick and matte. I did a farmhouse style pattern in my kitchen using chalk paint and it dried so fast I could do the whole wall in one session.
Fixing Mistakes Because You Will Make Them
When you mess up, just wait for it to dry completely then paint over it with your base wall color. Let that dry, then restencil. Trying to fix wet mistakes makes them worse, trust me. I once tried to wipe off a bleedy edge while it was still wet and just smeared it into a bigger mess.
Keep a small artist brush and your base wall color handy for touch-ups. After you finish the whole wall, step back and look for any spots where the pattern isn’t quite right. You can usually fix small issues with a tiny brush and nobody will ever notice.
Sealing Your Work
If it’s in a high traffic area or somewhere that might get touched a lot, you can seal it with a clear matte sealer. I use a spray sealer because brushing it on can sometimes smudge the stenciled areas if they’re not bonded perfectly to the wall. Two light coats of spray sealer and you’re good.
For most walls though, once the paint is fully cured after a few days, it’s durable enough. The stenciled paint becomes part of the wall paint and wears the same way.
My Current Favorite Patterns
Geometric patterns are super forgiving because if you’re slightly off nobody can tell. Organic patterns like florals or damask show mistakes more easily. If you’re new to stenciling, go geometric.
I’m obsessed with modern moroccan tile patterns right now. They give that expensive tile look for literally the cost of paint and a $25 stencil. Did my powder room in a cement tile pattern and people always ask where I got the tile installed.
Large scale patterns make rooms feel bigger. Small busy patterns can make spaces feel cluttered unless you’re only doing one accent wall. I usually recommend going bigger than you think you should.
This is gonna sound weird but I always take a photo of my first few stencil placements and look at it from across the room. Sometimes what looks good up close doesn’t read well from a distance, and you wanna know that before you’re halfway done with the wall.
The nice thing about stenciling versus wallpaper is if you hate it, you just paint over it. No steaming, no scraping, just paint. Makes it less scary to try bold patterns because there’s an easy exit strategy.