Wall Art Guide, Wall Art Tutoriels
Narrow Vertical Wall Art: Slim Tall Portrait Pieces
May
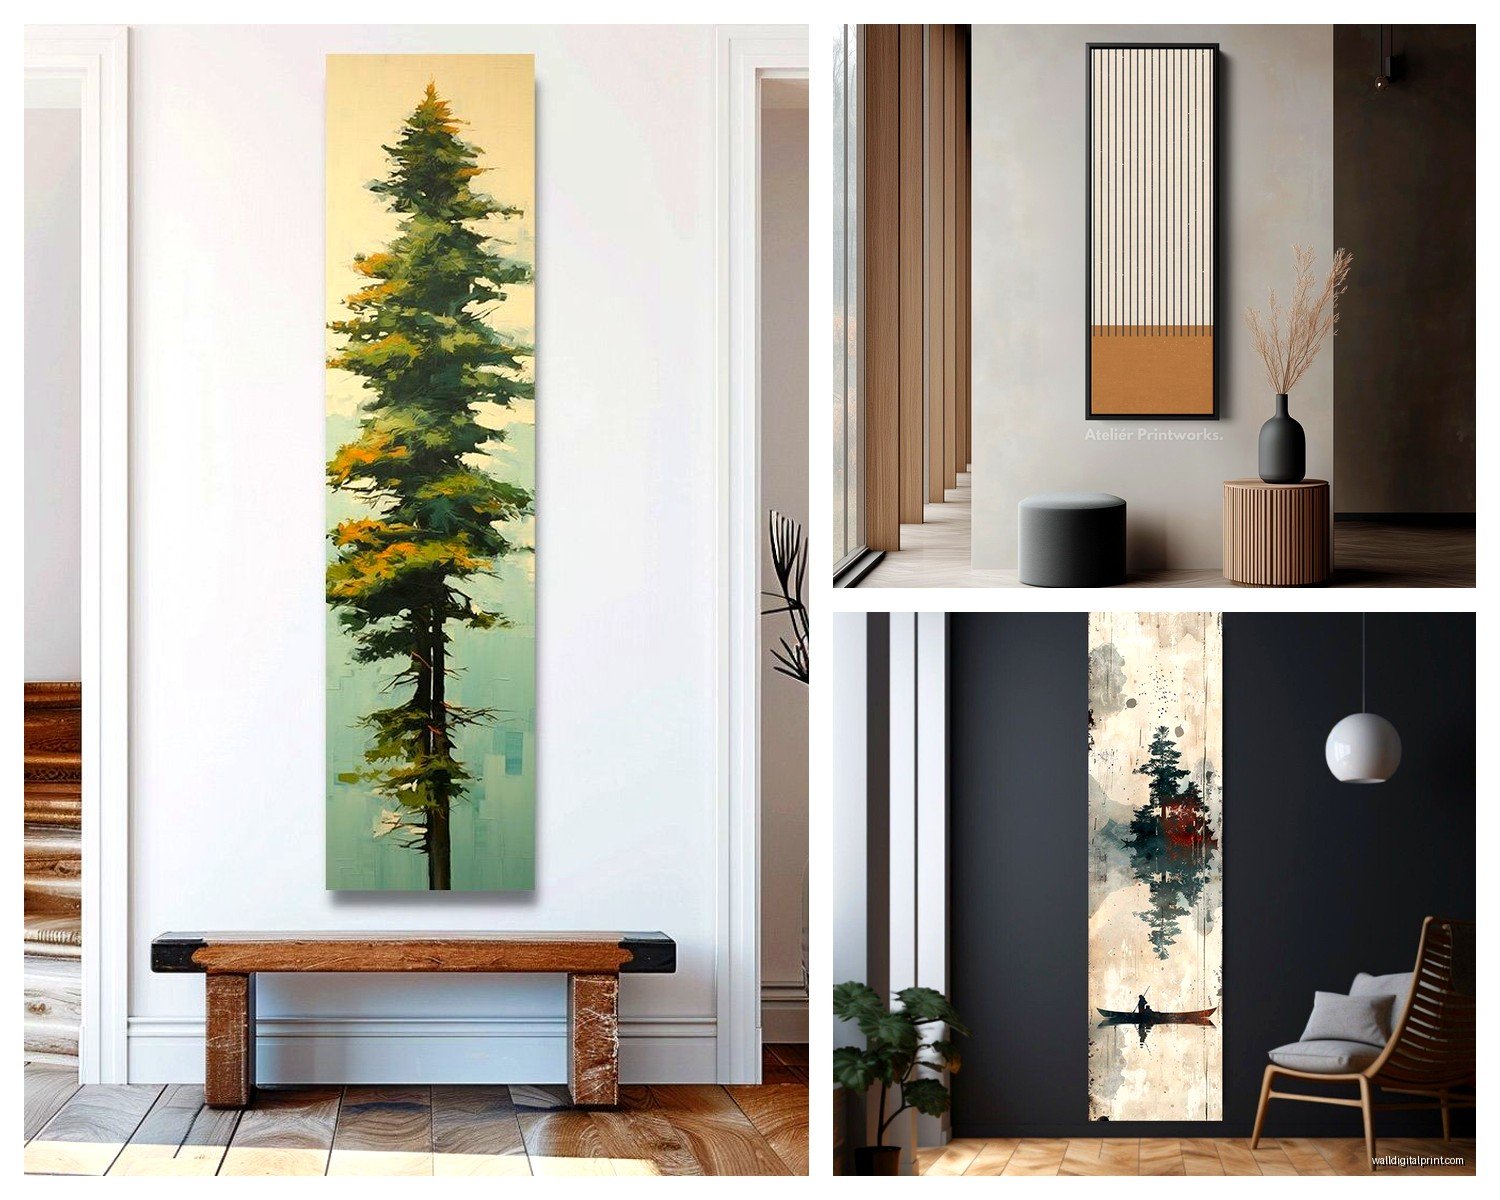
So I’ve been obsessing over narrow vertical art lately because honestly it’s the one thing most people completely overlook when they’re decorating. Like everyone’s out here buying these big horizontal statement pieces and then they have this awkward tall skinny wall space next to a door or between windows and they’re just… stuck.
I had this whole thing last month where a client had this gorgeous Victorian townhouse and there was this space between her bathroom door and the corner that was maybe 8 inches wide but like 6 feet tall and she kept trying to put shelves there which looked absolutely terrible. We ended up finding this slim botanical print and it completely transformed the hallway. But anyway, let me actually break down what works because I’ve tested SO much of this stuff.
Where These Actually Work Best
Okay so the obvious spots are next to doorways but there’s actually way more places than you’d think. I keep a running list on my phone now because I got tired of walking into spaces and being like “oh yeah that would’ve been perfect for…”
Next to windows is huge especially if you have those typical builder-grade windows that are just floating on a wall with tons of space on either side. A narrow vertical piece about 6-10 inches wide can balance things out without blocking light or making the window feel crowded.
Stairway walls are another big one. Everyone does the gallery wall thing going up stairs but sometimes you just want one elongated piece that follows the angle. I did this in my own place with this abstract piece that’s like 8×40 inches and people always ask about it.
Between built-ins or bookcases. If you have two bookcases with a gap that’s too narrow for furniture but too wide to ignore, a slim vertical piece fills it perfectly. Oh and another thing, bathroom walls next to mirrors or vanities where you don’t have a ton of space but need something.
The back of doors sometimes if you’re really tight on space though this is more of an apartment hack than something I’d do in a permanent home.
Size Ratios That Actually Look Good
This is where people mess up constantly. They think narrow means ANY narrow piece will work but there’s definitely ratios that look intentional versus ratios that look like you just grabbed whatever fit.
The sweet spot I’ve found is pieces that are between 6-12 inches wide and at least 24 inches tall, but honestly the taller the better for most applications. Like 8×36 or 10×40 looks way more deliberate than 8×20 which can read as just… small.
If your wall height is 8 feet you want something that’s at least 36-48 inches tall to have visual impact. For 10 foot ceilings I go even bigger, sometimes up to 60 inches. The proportion should feel like it’s reaching but not straining if that makes sense.
I usually tell people to measure their wall space and aim for art that takes up about 60-75% of the available height. So if you have a 6 foot tall space between your door frame and ceiling, you’d want art that’s roughly 43-54 inches tall.
Width-wise, for spaces that are 12 inches or less, you want your art to be about 2-3 inches narrower on each side. Don’t go edge to edge it looks cramped and weird.
What to Put in These Spaces Content-Wise
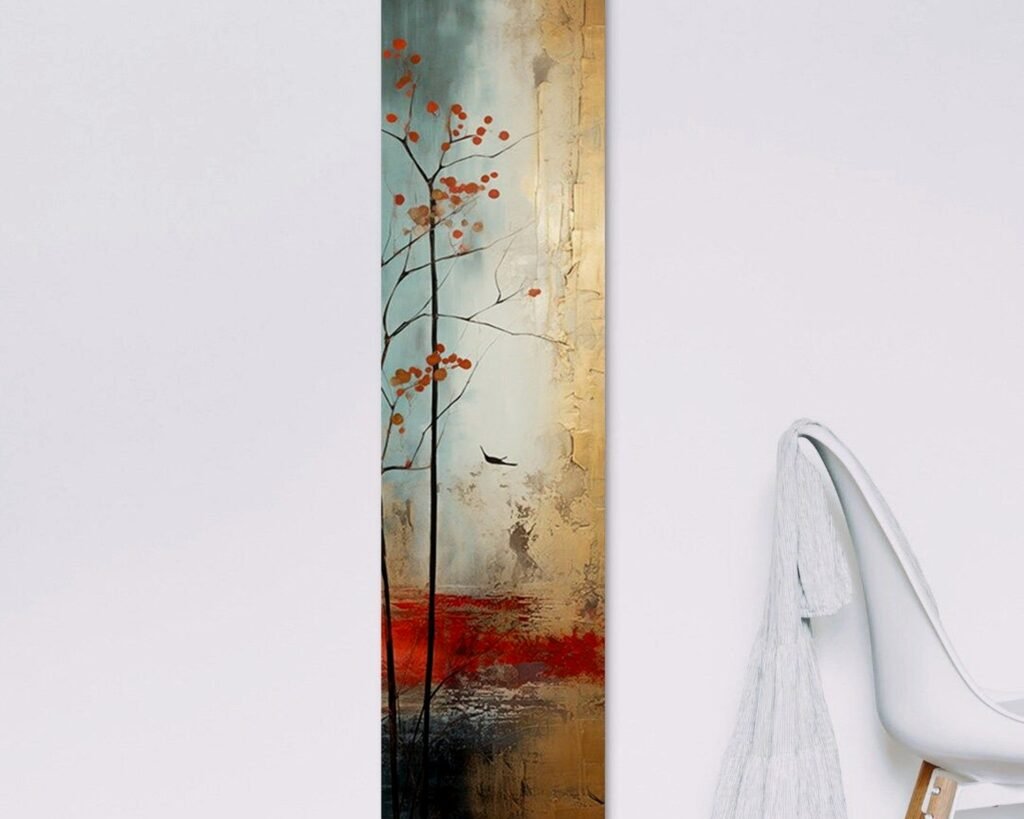
Botanicals are like the obvious choice and yeah they work great. Those vintage botanical prints or modern line drawings of plants, grasses, tall flowers. Eucalyptus branches, palm fronds, that kind of thing just naturally fits the format.
But I’m honestly more excited about abstract pieces lately. Vertical stripes or color fields or those watercolor washes that just flow downward. There’s this artist I found on Etsy (god I can’t remember her name right now, it’s saved on my work laptop) who does these gorgeous narrow abstracts that look like light filtering through water and I’ve used them in probably five different projects.
Typography can work if it’s the right style. Like a single word running vertically or a short quote stacked. I did “EXHALE” in a client’s yoga room on a 6×48 canvas and it was perfect. But you gotta be careful with this because it can veer into that “Live Laugh Love” territory real quick.
Architectural drawings or cityscapes work surprisingly well especially if they’re of tall buildings or structures. There’s something satisfying about having a vertical architectural element in a vertical format.
Portraits obviously, though you need to be thoughtful about this. A traditional portrait in a super narrow format can look… off? But stylized faces or profile views can be stunning.
Framing Options That Don’t Look Cheap
Okay so this is gonna sound weird but the frame matters MORE on narrow pieces than regular art because there’s less visual space for your eye to process so the frame is a bigger percentage of what you’re seeing.
Thin frames work best usually like 0.5 to 1 inch width max. Anything chunkier overwhelms the actual art. I’m obsessed with these thin black metal frames you can get from Framebridge (not sponsored I just use them constantly). They’re like $80-120 depending on size which isn’t cheap but they look SO much better than the Amazon basics frames.
Natural wood frames are great too especially light oak or maple. The wood grain adds texture without adding visual weight. I avoid dark walnut on narrow pieces unless the art itself is really bold because otherwise it can look too heavy.
Floating frames where there’s a gap between the art and frame can be really cool for this application because it adds dimension without width. Though they’re harder to find in custom sizes.
Canvas prints without frames are totally fine if the edges are finished nicely. Gallery wrapped edges where the image continues around the sides. Just make sure the canvas is thick enough, like 1.5 inches minimum, so it doesn’t look flimsy.
Oh wait I forgot to mention, if you’re doing a print on paper you NEED a mat even on narrow pieces. A thin mat like 1-2 inches gives the art breathing room. Without it the whole thing can look cramped.
Where to Actually Buy These
This is the annoying part because most mass market places like Target or HomeGoods don’t really carry narrow vertical art in good sizes. You’ll find some but the selection is limited and tends to be pretty generic.
Etsy is honestly my go-to for this. You can search specifically for dimensions and there are tons of artists selling digital downloads that you can print at your local print shop. I usually spend like $15-30 on the digital file then another $30-60 getting it printed on nice paper or canvas.
Society6 and Minted both have filtering options for vertical art and they do the printing and framing for you which is convenient. Quality is pretty consistent, I’ve ordered probably 20+ pieces from them over the years. Prices range from like $50 for a small unframed print to $300+ for larger framed pieces.
Local art fairs and student shows are goldmine for this stuff. Art students especially tend to work in non-standard sizes and you can get original work for way less than you’d think. I got this amazing charcoal drawing at a university show for $75 that would’ve cost $400+ at a gallery.
For photography, try 20×200 or Artfully Walls. They have curated collections and the quality is really good. Pricing is reasonable for what you’re getting.
If you want something custom, commissioning an artist isn’t as expensive as people think for narrow pieces. There’s less materials and space involved so prices are often lower than standard sizes. I’ve had pieces commissioned for $150-300 depending on the artist and medium.
Hanging These Without Losing Your Mind
The narrow format makes hanging kinda tricky because there’s not a lot of horizontal stability. Like if you just use one nail the whole thing can tilt really easily.
For pieces under 3 feet tall, two small nails or picture hangers work fine. Space them about 4-6 inches apart near the top of the frame. This prevents tilting and keeps everything stable.
For taller pieces I always use two D-rings on the back with wire strung between them, then hang from two hooks on the wall. The two-point hanging system is crucial for anything over 36 inches tall. My cat knocked over a 48 inch piece I’d hung with one nail and the frame cracked so yeah, learn from my mistakes.
Command strips can work for lightweight pieces especially if you’re renting and can’t put holes in walls. But get the picture hanging strips specifically not just regular command strips, and use at least two strips per piece.
Level is SO important with narrow verticals because any tilt is super obvious. I use a small bubble level every single time, even though I’ve been doing this for years. Don’t eyeball it you’ll mess it up.
Height-wise, the center of the art should be at eye level which is typically 57-60 inches from the floor. But in hallways or next to doors you might need to adjust based on the surrounding architecture. Sometimes hanging a bit higher looks better if it’s relating to door frame heights or ceiling lines.
Grouping Multiple Narrow Pieces
You can definitely do groupings of narrow vertical pieces but you gotta be careful it doesn’t look too busy or matchy-matchy.
Three pieces in a vertical stack can work if they’re each pretty short, like three 8×16 pieces stacked with 2-3 inches between them. This is good for really tall walls where one piece wouldn’t fill the space adequately.
Two pieces side by side works if you have a slightly wider space, like 20-24 inches of wall width. Keep them the same height and frame them identically with about 3-4 inches between them.
Mixing one narrow vertical with other shapes in a gallery wall is actually easier than you’d think. The narrow piece can anchor one side of the arrangement and balance out wider horizontal pieces on the other side. I just did this in my living room while watching The Bear (which is SO stressful why do I watch that before bed) and it turned out pretty good.
Color and Style Considerations
The narrow format tends to look more modern and contemporary just by nature of its proportions. So if you’re going for a traditional look you need to be more intentional about the art content and framing to make it work.
Monochromatic or limited color palettes work really well in narrow formats. Too much color variation can feel chaotic in a small space. I tend toward pieces with 2-3 main colors max.
Black and white photography or line drawings are basically foolproof. Clean, classic, works with everything. Maybe boring depending on your style but definitely safe.
If you want color, think about pulling one or two colors from your room’s existing palette. A narrow piece is an accent not a focal point usually so it should complement not compete.
Texture matters more than you’d think on narrow pieces. A flat print versus something with brushstrokes or mixed media or photography with grain… the texture adds interest that makes up for the limited size.
Mistakes I See People Make Constantly
Hanging pieces that are too short for the space. This is the biggest one. People get nervous about going tall and end up with something that looks dinky and lost.
Using super ornate or thick frames that overpower the actual art. Keep it simple.
Hanging narrow pieces horizontally because they “didn’t have room” for vertical. Just… no. Find a different piece or a different spot.
Not considering the sight line. If you’re hanging something next to a door people will see it from an angle as they walk through. Make sure it looks good from that perspective not just straight on.
Buying sets of matching narrow pieces and hanging them all together. It can work but usually looks too catalog-y. Mix it up a little.
Ignoring the lighting. A narrow piece in a dark corner just disappears. You need either good natural light or you gotta add a small picture light or nearby lamp.
Honestly the whole narrow vertical art thing is having a moment right now because people are finally realizing that not every wall space is a perfect square or rectangle and that’s okay. Like we’ve been forcing horizontal art into weird spaces for so long just because that’s what was available.
Anyway I’ve been rambling but hopefully this helps? The main thing is just measure your space carefully, go taller than you think you should, and don’t cheap out on the framing. And if you hate it after you hang it you can always move it somewhere else, that’s the nice thing about narrow pieces they’re versatile.