Wall Art Guide, Wall Art Tutoriels
Outdoor Garden Wall Art: Weather-Resistant Yard Decor
Apr
So I’ve been obsessing over outdoor wall art lately because my neighbor put up this gorgeous metal sunburst thing and I was like… I need to figure this out for real. The whole weather-resistant situation is trickier than you’d think because what works in California is gonna be totally different from what survives a Michigan winter, you know?
Materials That Actually Last Outside
Okay so first thing – not all “outdoor” art is created equal. I learned this the hard way when I bought this cute wooden piece from HomeGoods that literally warped within like three months. The paint started peeling and it looked tragic.
Metal is honestly your best friend here. Powder-coated steel or aluminum won’t rust the way regular metal does. I’ve got this powder-coated steel gecko on my back fence that’s been there for two years through rain, snow, the whole thing, and it still looks brand new. The powder coating is KEY though – regular painted metal will chip and then you’ve got rust spots everywhere.
Ceramic and mosaic pieces work surprisingly well if they’re properly glazed. I installed these ceramic tile murals for a client last spring and they’ve held up through everything. The glaze protects them from moisture getting into the ceramic itself which is what causes cracking when it freezes. Just make sure they’re rated for outdoor use, not just decorative indoor ceramic.
Resin and Composite Materials
Resin art has come SO far in the last few years. It used to look cheap and plasticky but now you can get these resin plaques that look like carved stone or weathered wood. They’re lightweight which is great for hanging, and they don’t fade in UV light like they used to. I hung a resin mandala thing above my outdoor shower and my dog keeps barking at it but whatever, it looks amazing.
UV-resistant composite materials are basically heavy-duty plastics engineered not to break down in sunlight. They’re not sexy to talk about but they WORK. I’ve seen composite wall planters that are five years old and still look perfect.
What Doesn’t Work (Save Your Money)
Canvas prints marketed as “outdoor” – they’re lying to you. Even with UV coating, they fade SO fast in direct sunlight. Maybe six months before they look washed out. I mean unless you’ve got a really covered area that never gets direct sun, skip these entirely.
Untreated wood is obviously a no. It’ll gray out, warp, split, collect moisture and get moldy. If you’re gonna do wood, it needs to be sealed with exterior grade sealant and even then you’re looking at maintenance every year or two.
Regular acrylic paints on anything outdoor… nope. They’ll fade and peel. You need exterior acrylics or better yet, pieces that are designed to be outside from the start.
Placement Matters More Than You Think
This is gonna sound obvious but the location makes a HUGE difference in how long stuff lasts. I put a metal wall sculpture on my south-facing fence in full sun and the dark finish faded noticeably in one summer. Moved it to a spot that gets morning sun only and it’s been fine ever since.
Protected areas under eaves or pergolas can handle more delicate materials. I’ve got some decorative mirrors (outdoor-rated with sealed backs) under my covered patio and they’re totally fine. Those same mirrors on an exposed wall would be a disaster.
Wind is something people forget about. I mounted these cool spinny metal pieces on my fence and didn’t account for how windy my yard gets. They banged against the fence constantly until I added rubber bumpers behind them. Think about wind patterns in your space.
Coastal Areas Need Special Attention
If you’re near the ocean, salt air is brutal on everything. You need marine-grade materials basically. Stainless steel, aluminum, or special coatings designed for coastal conditions. Regular metal art will corrode so fast near salt water. I had a client in San Diego who learned this the expensive way with some iron wall art that rusted through in like eight months.
Size and Scale Without Losing Your Mind
Outdoor spaces can handle WAY bigger pieces than you think. What looks huge inside looks normal outside because of the scale difference. I always tell people to go at least 20% bigger than feels comfortable. That piece you think is too large? It’s probably perfect.
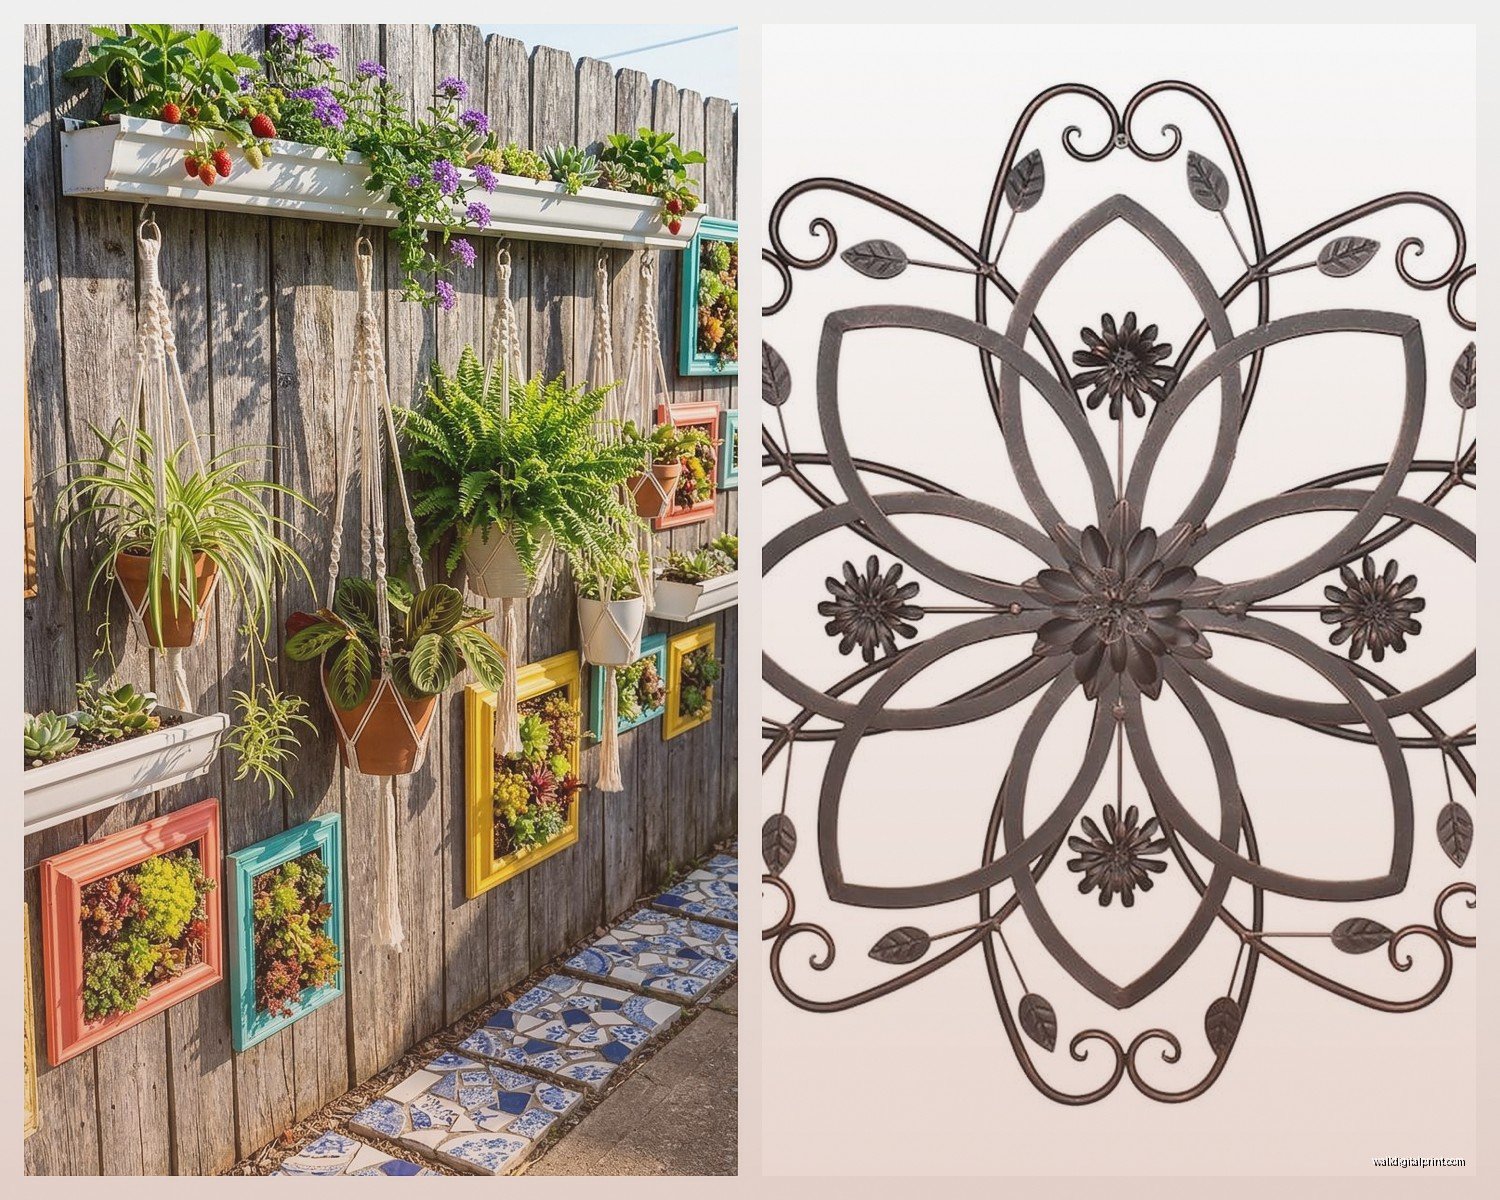
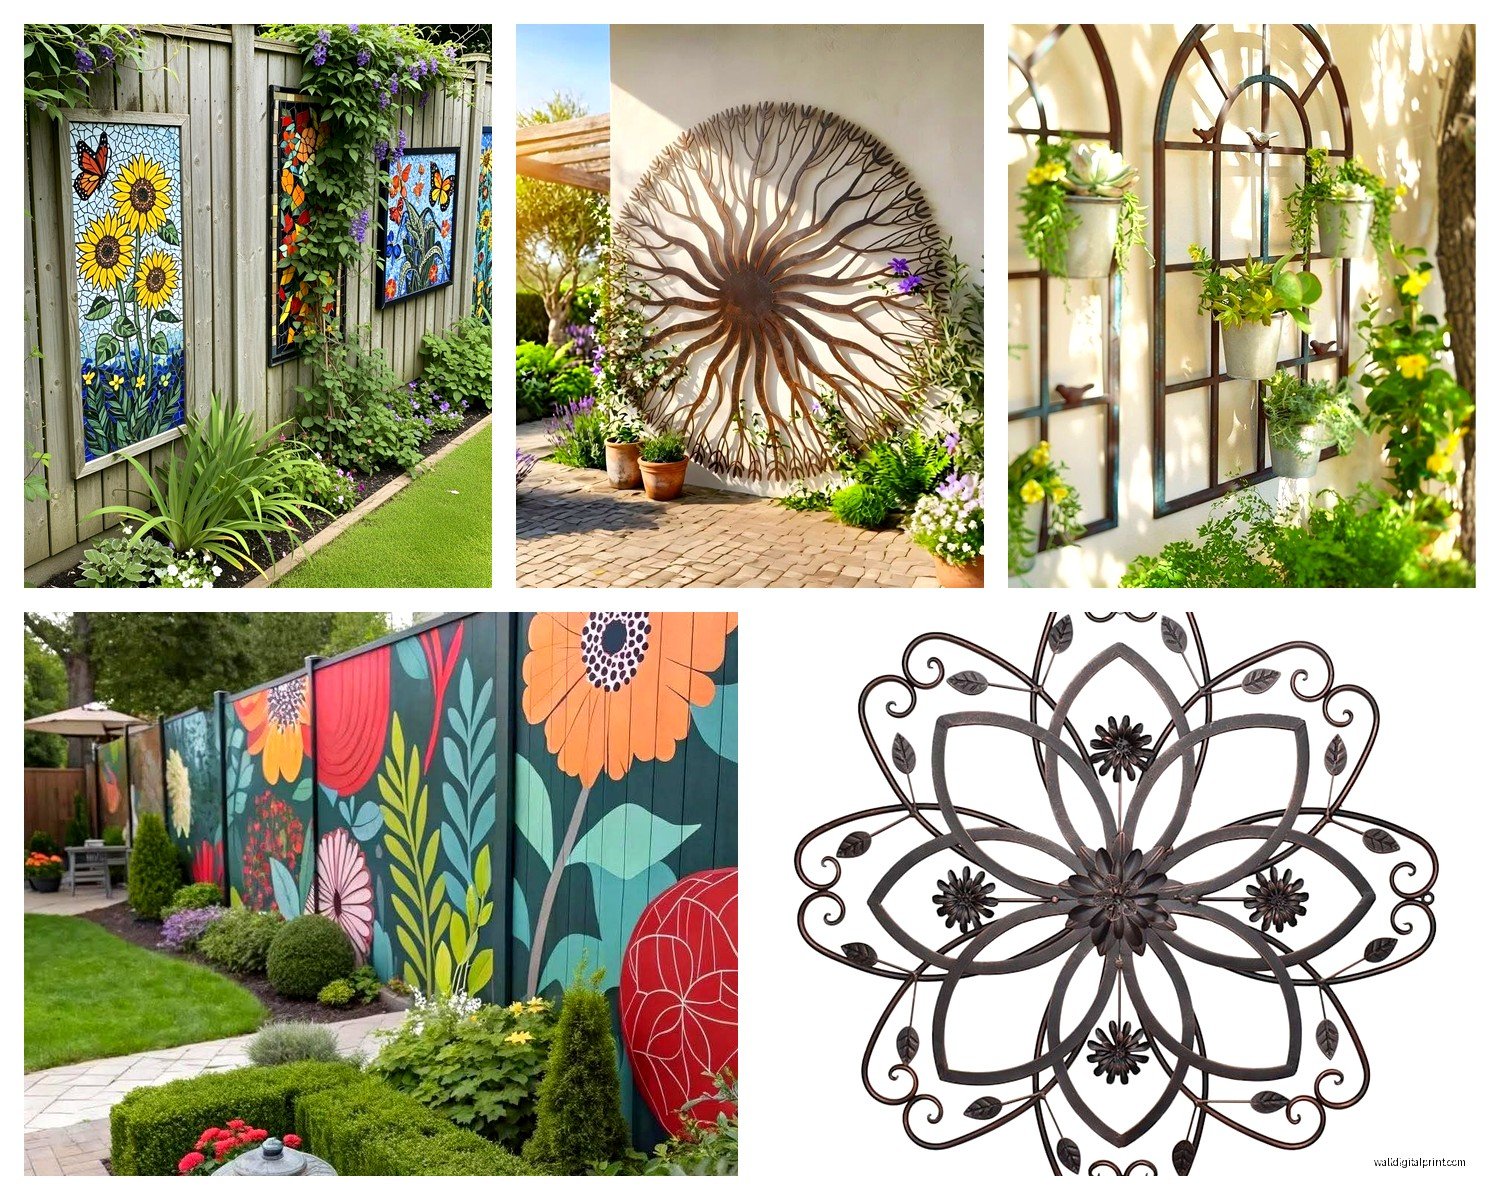
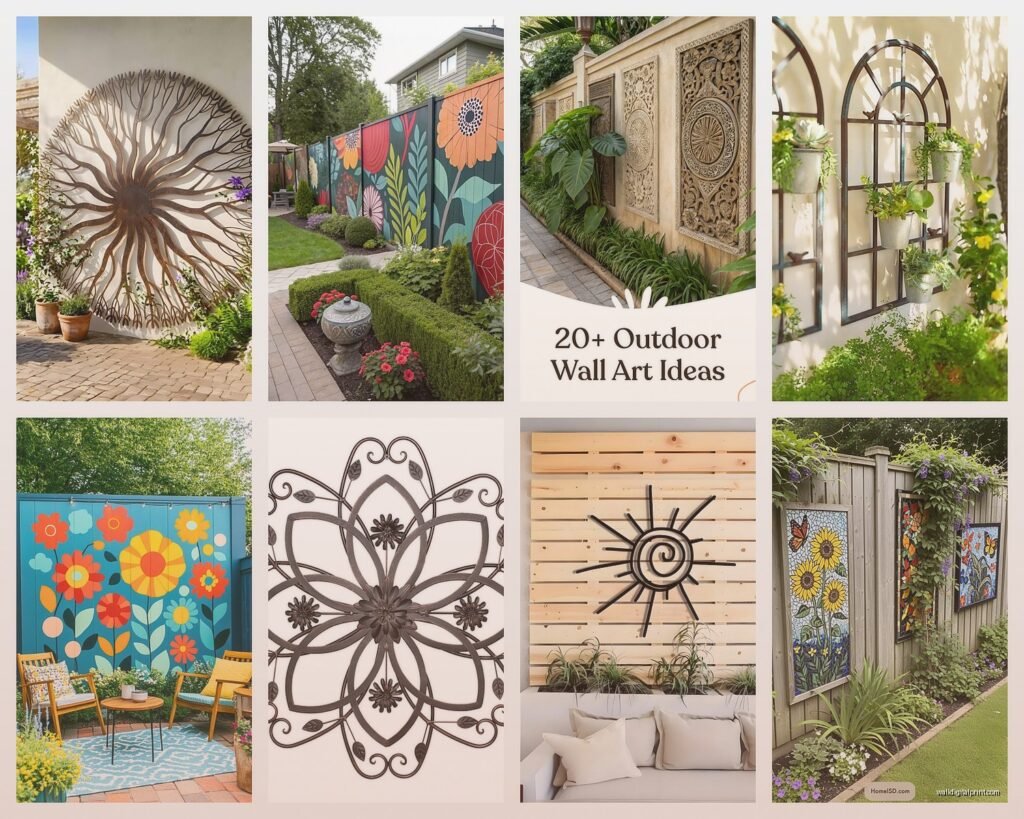
Multiple smaller pieces grouped together works better than one tiny thing on a big blank wall. I did this gallery wall situation on my fence with like seven different metal butterflies and flowers in different sizes and it actually looks cohesive instead of cluttered.
For reference, on a standard 6-foot privacy fence, a 24-30 inch diameter piece looks proportional. Smaller than that and it starts looking lost. On a house exterior wall, you can go even bigger – 36-48 inches easily.
Installation Tips That Actually Matter
Okay so mounting outdoor art is different than hanging a picture frame inside. You need to account for weight, wind, and the fact that it might get bumped or pulled on.
For fence mounting, I use exterior-grade screws with washers. The washers distribute the weight and prevent the hardware from pulling through the fence boards. Don’t use nails – they work loose over time with temperature changes and wind movement.
Brick or stucco walls need masonry anchors. Those plastic anchor things don’t cut it for anything with weight or wind resistance. I use Tapcon concrete screws or proper sleeve anchors. Yeah it’s more work to drill into masonry but your art won’t end up on the ground during a storm.
Hanging Systems vs Direct Mount
Some people use those outdoor command strips and honestly… they’re fine for lightweight stuff under 3 pounds in protected areas. I’ve used them for small resin plaques under my pergola. But anything heavier or more exposed needs real mounting hardware.
French cleats work great for outdoor art. You can make them from treated lumber or buy metal ones. The art can expand and contract with temperature changes without stressing the mounting points. Plus they make it easy to take pieces down for storage if needed.
Wire hanging systems look clean but make sure you’re using stainless steel or coated cable designed for outdoor use. Regular picture wire will rust.
Specific Pieces I’ve Tested and Trust
Metal sunbursts are having a moment and I’m here for it. The ones from Wayfair’s outdoor section (specifically the powder-coated steel ones) have held up great. They come in different sizes and the mid-tone bronze finish doesn’t show wear as much as black or bright colors.
Those laser-cut metal panels with geometric patterns or nature scenes – I’ve installed probably fifteen different ones for clients and myself. Look for 14-gauge steel minimum, anything thinner bends too easily. The ones from Etsy shops that specialize in metal art tend to be better quality than mass-market stuff.
Ceramic wall fountains are gorgeous if you’ve got an outdoor outlet nearby. The water feature aspect actually helps them last longer because the constant moisture keeps the glaze from developing those hairline cracks. I installed one last year that runs from spring through fall and it’s been perfect.
Mirror Options for Outdoor Spaces
Outdoor mirrors need sealed edges and backs to prevent moisture from getting behind the glass. I found these convex mirror sets at Target’s outdoor section that are specifically made for gardens – they’ve got powder-coated frames and completely sealed backs. They make small spaces feel bigger and reflect light around which is nice in shadier areas.
Don’t use regular mirrors outside. The silvering on the back deteriorates with moisture exposure and you end up with this blotchy, spotted look that’s impossible to fix.
Color Considerations for Longevity
Darker colors fade faster in direct sun than lighter colors. That deep navy blue wall art will turn grayish purple within a season in full sun. Metallics and earth tones hold their color better. Copper finishes develop a natural patina which actually looks better over time rather than worse.
If you love bold colors, look for pieces with automotive-grade powder coating or marine-grade finishes. They’re more expensive but the color stays true. Or place colorful pieces in shadier spots and use neutral tones for sun-exposed areas.
wait I forgot to mention – white and light colors show dirt and green algae growth more obviously. If you’ve got a humid climate or areas that don’t dry out quickly, darker finishes hide that stuff better between cleanings.
Seasonal Storage and Maintenance
In harsh winter climates, some pieces should come inside. Anything with moving parts (spinners, wind chimes, kinetic sculptures) will last longer if stored during freezing months. The mechanisms can freeze and break.
I take down my more delicate pieces around November and store them in the garage. Takes maybe twenty minutes total and they look better for longer. The heavy-duty metal stuff stays up year-round.
Maintenance is honestly pretty minimal for quality outdoor art. I spray mine down with the hose maybe three times a summer to remove dust and pollen. For stubborn dirt, mild soap and water with a soft brush works fine. Don’t use pressure washers – too much force can damage finishes or seals.
Protecting Against Algae and Mildew
If you’re in a humid area or have pieces in shade that stays damp, algae growth is real. I mix a solution of water and white vinegar (like 50/50) and spray it on occasionally. It prevents that green stuff from building up without using harsh chemicals that might damage finishes.
For powder-coated pieces, you can use automotive wax once a year. Creates a protective layer that makes cleaning easier and adds a bit more UV protection. I do this in spring right after cleaning everything.
DIY vs Store-Bought
I’ve done both and honestly, it depends on your skill level and what you want. Store-bought is easier and comes with warranties usually. But DIY lets you get exactly what you want in terms of size and design.
If you’re gonna DIY, use exterior materials from the start. Don’t try to weatherproof indoor materials – it never works as well. Marine-grade spar urethane is your friend for wood projects. Exterior spray paint in multiple thin coats rather than one thick coat.
I made these mosaic stepping stones that I hung on my fence as art pieces using exterior tile adhesive and grout. They’ve been outside for three years and look great. The key was sealing the grout really well so moisture doesn’t get in and cause cracking in winter.
Upcycling with Weather Protection
Old windows, shutters, metal grates – all that stuff can become outdoor art with proper treatment. I took an old window frame, removed the glass, backed it with hardware cloth, and planted succulents in the panes. Sealed the wood really well with exterior polyurethane. It’s holding up fine in a covered area.
Metal pieces from architectural salvage are awesome. They’re usually heavy-gauge metal that was meant to be outside anyway. Just clean off rust with a wire brush and spray with rust converter then seal with clear coat.
Lighting Integration
oh and another thing – backlit wall art looks AMAZING at night. You can get these metal silhouettes designed to be lit from behind. I installed LED strip lights behind a metal tree sculpture and it creates this cool shadow effect on the fence. The LED strips are outdoor rated and low voltage so they’re safe and energy efficient.
Solar-powered wall art is hit or miss honestly. The solar panels aren’t always strong enough to power anything substantial. But for small accent pieces with just a few LEDs, they work fine. I’ve got a solar metal moon that lights up at night and it’s been reliable for two summers.
Budget-Friendly Options That Don’t Look Cheap
You don’t have to spend hundreds of dollars. I found amazing pieces at HomeGoods, TJ Maxx, and even Dollar Tree’s outdoor section. The key is checking the materials and construction quality regardless of price.
Those expandable metal trellis panels can be spray painted and used as decorative wall art. They’re like ten bucks each and once you paint them in a nice color and arrange them in a pattern, they look intentional and designed.
Thrift stores and yard sales are goldmine for heavy metal pieces. Old gates, architectural elements, even vintage signs. Most just need cleaning and maybe a fresh coat of outdoor paint.
This is probably gonna sound weird but I’ve used outdoor-rated vinyl decals on my shed wall and they’ve lasted two years so far. The key word is outdoor-rated – they’re thicker and UV resistant. Way cheaper than buying actual art pieces and you can change them out easily.
Common Mistakes to Avoid
Don’t hang art on a surface that’s already damaged or deteriorating. I made this mistake putting a beautiful piece on a fence section that had rotting boards underneath. The fence gave out before the art did which was… not great.
Overcrowding looks messy outside just like inside. Leave breathing room between pieces. I space mine at least 12-18 inches apart minimum.
Forgetting about plant growth is a thing. I hung art that looked perfect in March and by July the vines had completely covered it. Think about how your landscaping grows throughout the season.
Not testing mounting hardware before installing the actual art – always mount the brackets or cleats first and make sure they’re solid before hanging your piece. I’ve seen too many things fall because someone didn’t verify the mount was secure.
Anyway I gotta go because I’m supposed to meet my sister for lunch but hopefully this helps. The main thing is just making sure materials are actually rated for outdoor use and mounting stuff properly so it doesn’t become a projectile in a storm. Let me know what you end up getting!